Here are easy to follow steps and tips to paint your dated bath cabinets!
Hello, my name is Rebecca Rolfes and I’ve been an interior designer and stager for over 13 years. One of the things I hear from my clients is “I hate my builder bath vanity, but I don’t have the money to renovate my bath”. How many of you have old cabinets? Are you fearful to paint them? To create a fresh, new, budget conscious look for your dated cabinets, follow the easy steps below!
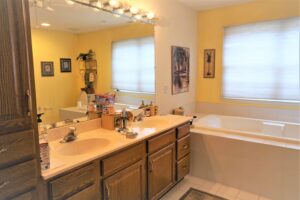
Let me start with a before picture of my client’s oak bath cabinets.
Step 1
Empty your cabinets, unscrew the doors, and remove the drawers. FYI- you will not save time by not removing the doors. I do recommend numbering your cabinet doors and drawers, so you remember where they came from.
If you’re reusing the hardware, stash it in a bag, and label it too. Wipe down all the exterior surfaces with a sponge and a cleaner that strips the wood of grease and dirt such as Savogran TSP-PF all-purpose heavy-duty cleaner.
Step 2
If you’re planning to replace the pulls or knobs with new ones, fill any holes left from the original hardware with spackling paste, such as MH Ready Patch, and let dry. Sand the wood using medium-grit sandpaper wrapped around a block for flat surfaces and small pieces of sandpaper for beveled edges and trim. Vacuum up any dust using a brush attachment, then wipe everything down with a tack cloth.
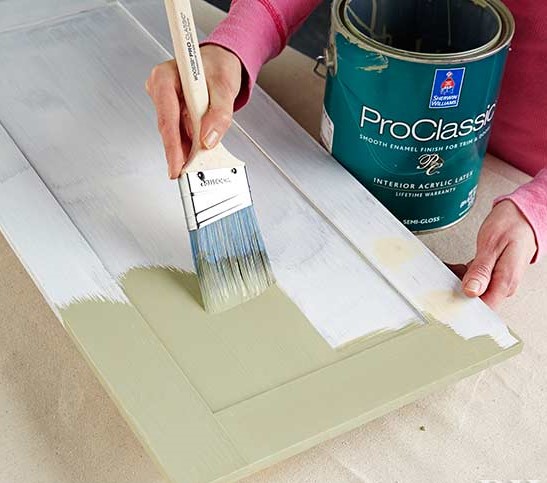
Step 3
Using a 1” angled brush, prime the edges and any grooves in the doors and drawer fronts. Next, with a 2 ½” straight brush and a high-density foam roller made for smooth surfaces, prime the flat surfaces on the doors and drawers. Using a roller along with your brush will save you a lot of time. Let dry, then prime the door backs. Use the angled brush or roller to prime the cabinet frames. Work in long, steady strokes, going in the direction of the wood’s grain. Finally, use the straight brush to prime all of the cabinet sides.
Step 4
Paint the doors, drawers and cabinet frames with two coats of the semi gloss latex, following the same method you used to prime them. Let dry for 24 hours. Then reinstall everything and screw your new (or original) hardware into place. You can add small cork bumpers to the insides of doors and drawers, so they won’t slam into the frame and chip your nice, new paint job.
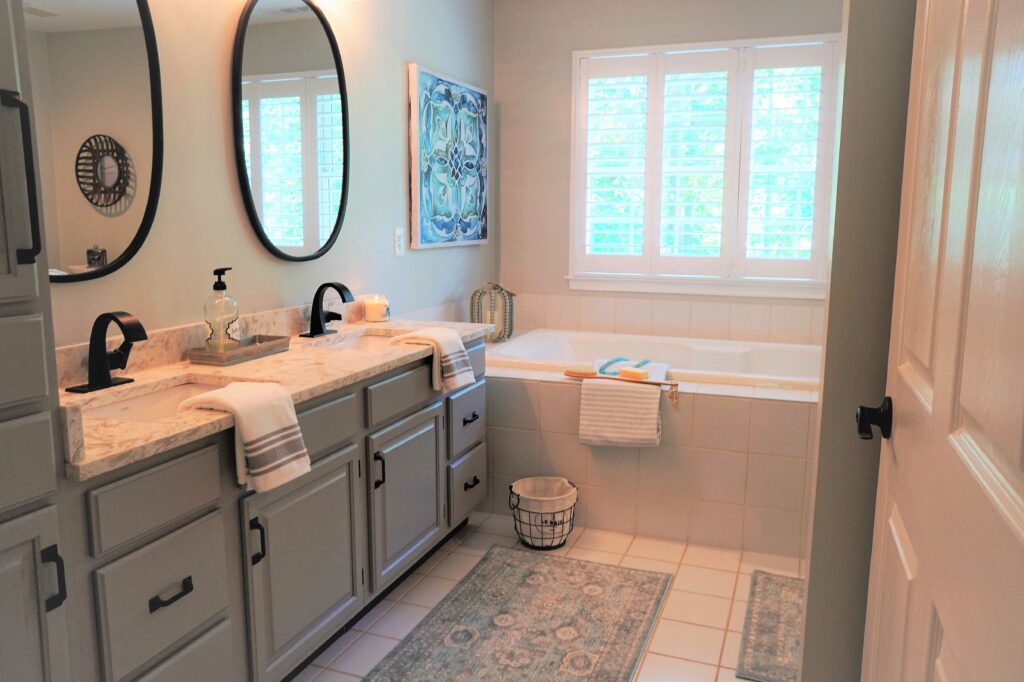
Now let’s look at the amazing After painted oak bath cabinets!
Save time and don’t make these common mistakes!
Clean, clean, clean your cabinet. Do not skip this step. Years of hair spray and other chemicals are on your cabinet. Cleaning will ensure that your cabinet will adhere the primer to your cabinet. If you don’t clean your cabinet, all your hard work will soon peel off.
The first coat has been applied you begin to panic, and instantly regret your decision. I have been there, don’t be alarmed if the first couple of coats look terrible. After a few more coats of paint, the cabinets will start to look much better!
Make sure that you purchase the right type of roller. A roller made for smooth surfaces and not a wall roller. I love foam rollers for cabinets. So much faster to paint.
To save time you decided it would be easier to leave the cabinet doors on instead of removing them. I highly recommend removing the cabinet doors. I guarantee that you will be happy you did. I left my doors on my first cabinet job and I ended up making a mess of my hardware. Only takes a few minutes and it you will spend more time cleaning up your paint splatters.
Last tip- cover your floor and countertop with drop cloths or old sheets. As they say prep is most of the work. This is a step you want to do, do not skip or you will be finding small paint splatters for months.
Thanks for reading!
Rebecca